Dear Observer
Welcome at the 2.2m MPG telescope ! This page is made to help you with the observation of gravitational lenses for the COSMOGRAIL project, which is led by the Laboratory of Astrophysics of the École Polytechnique Fédérale de Lausanne (EPFL).
During your observing run, you will observe gravitational lenses every night, typically for one hour and a half in summer time and two hours and a half in winter.
Enter eCOSMOGRAIL
eCOSMOGRAIL, for extended COSMOGRAIL is the next big step forward concerning the time-delay measurements. Instead of monitoring the lensed QSOs over many years with ~2 observations per week, we aim at one observation per day with a increased signal-to-noise ratio, in order to get a precise and accurate measure of the time delays in less than a year.
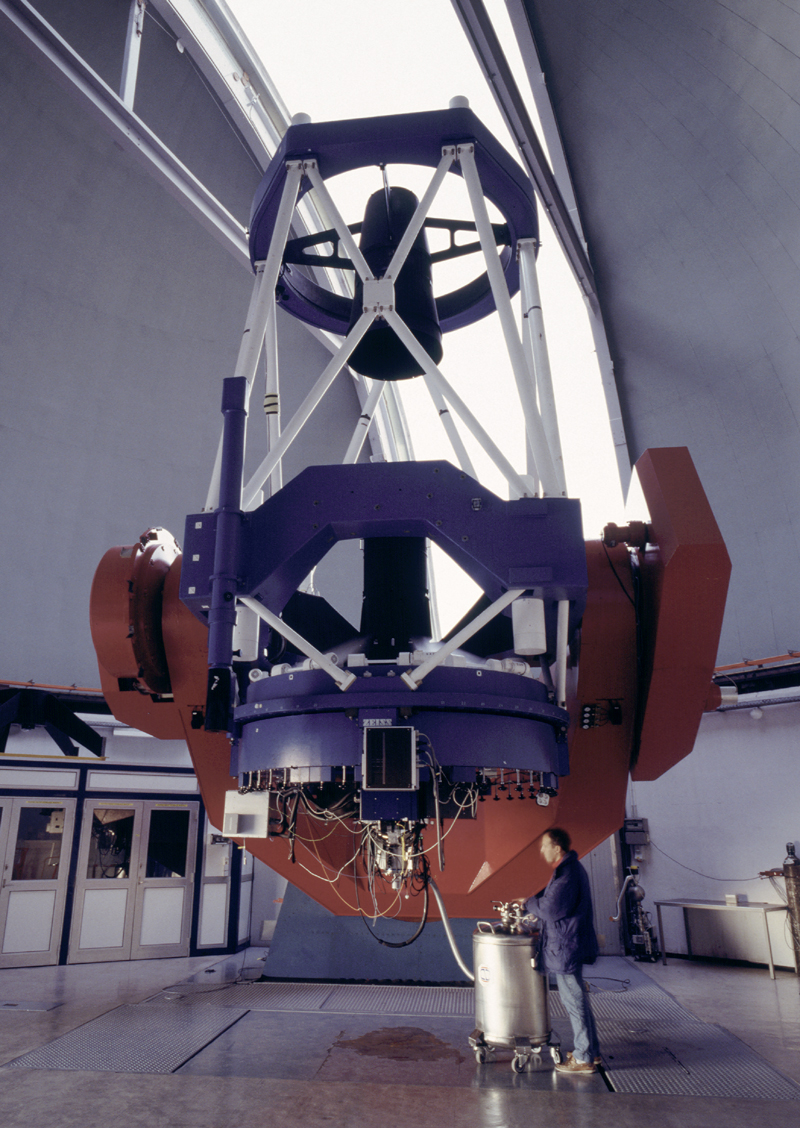
To do so, we make use of the WFI camera mounted on the ESO/MPG 2.2m telescope, located in La Silla, Chile. Through an agreement with the Max Planck Institute of Astronomy currently owning the telescope, roughly 20% of each observing night is dedicated to the monitoring of lensed quasars. This agreement has been made possible thanks to the financial and human support of all the parties involved: Frédéric Courbin at EPFL (PI), Elizabeth Buckey-Geer at Fermilab, Christopher D. Fassnacht at UC Davis, Josh Frieman at Fermilab/KICP, Philip J. Marshall at KIPAC, Sherry H. Suyu at MPA/TUM/ASIAA, Tommaso Treu at UCLA, Timo Anguita at UNAB and Verónica Motta at UV.
The average expected time delays for the quasars monitored at the ESO/MPG 2.2m telescope is ~30 days. The typical time-scale of the luminosity variations that we want to observe is in the order of a few days.
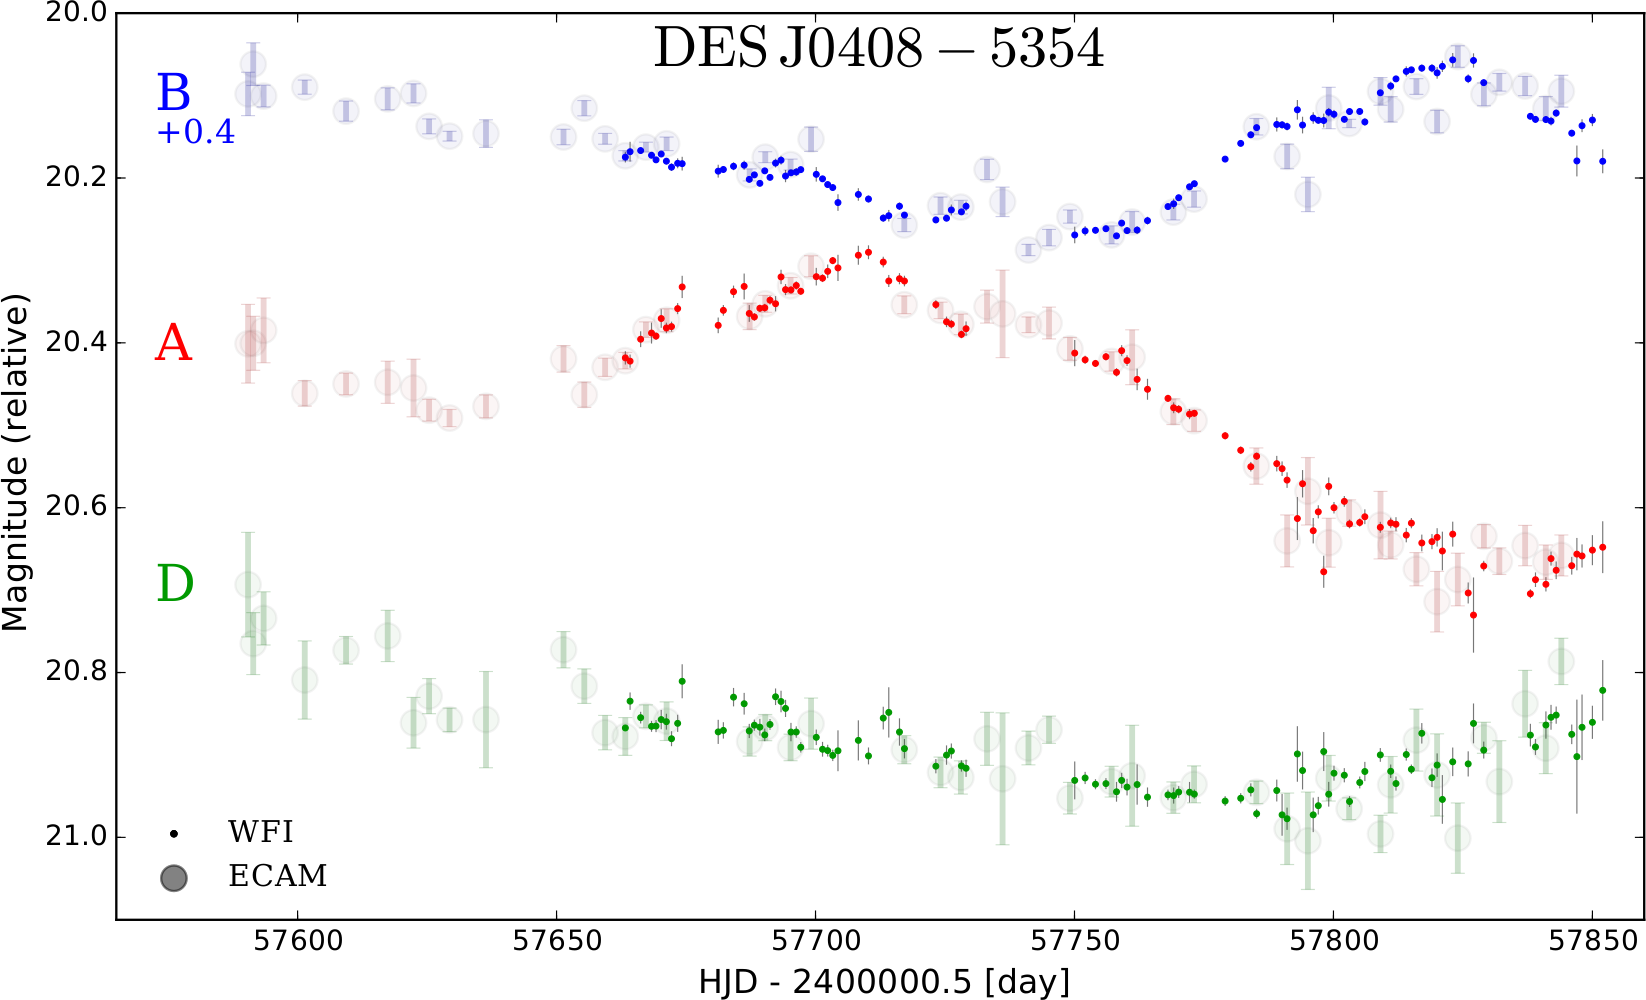
The figure above presents the light curves of DES J0408-5354 after six month of monitoring with WFI at the 2m2 (small dots) and eight months of monitoring with ECAM at the Euler Swiss Telescope (larger shallow dots). The sharp, well defined feature in the A and B light curves allowed us to measure a precise and accurate time delay from the WFI data, as presented in Courbin et al. 2017. A successful monitoring campaign like the one on DES J0408-5354 relies mainly on two key points:
- A long baseline of observations: we need to monitor the lensed images for a long enough period of time in order to catch as many luminosity variations as possible. Typically, we want to monitor for at least 5-6 times longer than the typical variations, which makes a minimum of six months of continuous monitoring.
- An high-cadence monitoring coupled with an extremely regular sampling: since we want to catch luminosity variations that lasts only a few days, we need enough points to properly sample these features in the light curves.
Thanks to the effort of the STRIDES collaboration, this object allowed a 3.9% precision measurement of the Hubble constant.
Observing with WFI
WFI, for Wide Field Imager, is one of the three instruments mounted on the 2.2m MPG telescope. Operating the telescope is described in details in the operation manual. Take some time before the start of your run to go through the manual. The support astronomer that is present during the first half of the night will help you with the telescope operation, but you should be able to manage it on your own for the second half of the night.
In the following, you will find a “click-by-click” description of how you should observe a lens. It might look dreadful at first glance, but if you follow it carefully you should be able to observe just fine. Note that most of this procedure is common to any WFI usage, so it might even help you for your own observations !
Calibrations
These are usually done during the afternoon and twilight by the support astronomer. It consists of a sequence of biases, dome and sky flats in the BB#Rc/162 filter, pointing and focus calibration of the camera. Note that we need sky flats every evening (if the sky is cloudless, otherwise don’t even think about sky flats), and dome flats once per day (afternoon or morning), so please make sure that the support astronomer takes these calibrations.
If possible, the focus exposure should be taken in the same filter than the observations (BB#Rc/162) and in a field close to the target – it can even be done on the target’s field directly.
Plan the observations
Look at the planning to know which lenses you have to observe for each night of your run. Each lens is represented in a small plot that indicates the observability of the target. The green interval indicates that the target can be observed, the blue/red intervals indicate that the target is a bit too close to the moon at at low airmass (but is still observable!). As much as possible, please do your best to plan the observations during the middle of their corresponding green band, which corresponds to the minimum in airmass of the target.
On top, right after the name of the lens you can see from when to when (in UT) you can schedule the observation. Keep in mind that each observation takes around 30 minutes (the duration is indicated in the planning), so don’t start it too late ! If the target visibility is shorter than 20 minutes, i.e. it is visible only at the beginning or at the end of the night, please schedule the observation so that it starts right at the beginning of the night, or ends at the end of the night, respectively. Note that you can observe as long as the sun is 12 degree below the horizon (this corresponds to the nautical twilight).
As explained above, a key point for the success of this program is to observe the targets regularly. Although the observations are repeated every day, each exposure is important and must be treated as time-critical. It is better to take a point in bad conditions (thin clouds, bad seeing, high airmass – i.e. being slightly outside the observability range) than no point at at all !
Observe !
Each observation is performed by executing an Observing Block (OB).
- Load the OB into BOB (Broker for Observing Block, the tool that lets you execute your OB). The OBs can be loaded directly from the WFI computer using the “Fetch from file” option of BOB, the same way end-of-night calibration exposures are loaded. The path is: WFI/SYSTEM/COMMON/ TEMPLATES/OBD/QSOMonitoring or something very similar. In case of doubt, ask the support staff!
- Execute the OB by clicking “Start” on the “BOB” window. The first exposure is the acquisition template: its use is to center the lens on the right position. The telescope should move to the quasar field, and take a short exposure. Then, on the “RTD – Wide Field Imager” monitor, on the “rtd” window you should see the lens approximately on the middle of the third-from-the-left chip of the top row (the green square in this picture). Use the finding charts to identify the lens – note that it might be quite faint, since the acquisition exposure is typically short. A first popup should have appeared, asking you if you want to refine the coordinates of the lens. Click on “refine acquisition”, then you should see a second popup asking you the x-y coordinates of the target: on the “rtd” window click “view – pick object”. On the “Pick Object” window that just appeared, click on “Pick Object” (The button at the bottom, not the title of the popup, follow a little if you please !) and then click on the center of the lens on the “rtd” window. You will see on the “Image X” and “Image Y” field of the “Pick Object” window the values you should put on the second popup. Once this is done, click “Ok” on that popup window. When it asks what you want to do next, click on “Offset and quit”.
- Once this is done, a popup appears and asks you to pick a guiding star. This is done on the “Telescope Control Software” and “WFI AUTOGUIDER” monitors. Make sure that you are on the correct desktop (“Control Panel”). In the “TCS Control Panel” window, click on “retrieve field”. After a few seconds, on the “Skycat” window you should see a new image appear. Click on “TCS – Pick reference star” and in the popup window click on “Pick Object”. On the “Skycat window”, chose the brightest, non saturated star and click on it. It will draw a square box around the star. On the popup window, reduce the size of the box by sliding the “Sample size” cursor such that is is only slightly bigger than the star. If the box moves away from the star when doing so, simply pick the star again by clicking on “Pick Object” on the popup window. Once you’re satisfied with the size of the box, on the “TCS Control Panel” window click on “Box to Star” and wait a few seconds. The image on the “Skycat” window should change to a zoom-in cut on the star you just selected. On the “TCS Control Software” window, in the “Autoguider” section the CCD Stat should be “InfiniteLoop” and the “AG Stat” should be “–ACTIVE–“. When this is done, you can click on “Ok” on the popup window asking you to pick a guiding star, and finally proceed with the observations.
- The science exposures should now proceed smoothly without any further input from your side. After the first exposure, look at the image in the the “Rtd” window and make sure that the lens is approximately centered on the third-from-the-left chip of the top row (the green square in this picture). Once all the exposures (typically 4) are done, you can either restart from step 2 with another lens, or move to another instrument/program.
Night report
At the end of each night (or once you observed all the lenses for the night), you are kindly asked to fill a small night report that mentioning the weather conditions, the targets you observed and any problem you might have encountered. Fill this report even if bad weather prevented you to do any observations during the night. This will help us adapt the observing strategy to the 2.2m environment in the future.
Observing with FEROS and GROND
During your run, you might be asked to observe targets with FEROS and GROND, the two other instruments mounted on the 2.2m telescope. The operation manual will guide you through the different steps.
A cookbook summarizing the main steps of these observations can be found here. If you feel motivated, you can increment it here.